/


搜索到
51
篇与
的结果
-
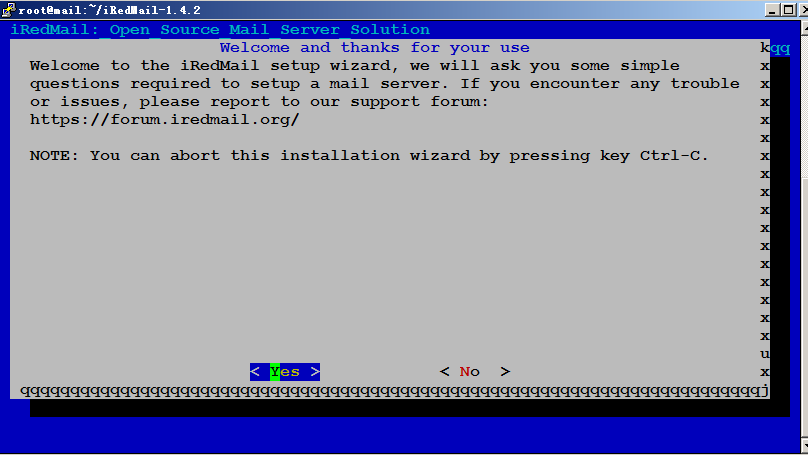
 CentOS 7 - 安装iredMail 邮件服务器 CentOS 安装 iredMail服务器系统[root@mail]# cat /etc/redhat-release CentOS Linux release 7.9.2009 (Core)更新系统yum update -y1. 下载iredMail下载地址:https://www.iredmail.com/download.html#CentOS 8 stream wget https://github.com/iredmail/iRedMail/archive/refs/tags/1.5.2.tar.gz #CentOS 7 wget https://github.com/iredmail/iRedMail/archive/refs/tags/1.4.2.tar.gz1.1 其他开源邮件服务器EwoMail: 下载地址:http://www.ewomail.com/list-11.html访问地址:邮箱管理后台:http://IP:8010 (默认账号admin,密码ewomail123) sl端口 https://IP:7010 web邮件系统:http://IP:8000 ssl端口 https://IP:7000 域名解析完成后,可以用子域名访问,例如下面 http://mail.xxx.com:8000 (http)DKIM设置:amavisd -c /etc/amavisd/amavisd.conf showkeysamavisd -c /etc/amavisd/amavisd.conf showkeys测试DKIM是否生效:amavisd -c /etc/amavisd/amavisd.conf testkeys #显示pass正确2.设置主机名# 检查主机名 [root@localhost ~]# hostname -f localhost # 设置主机名 [root@localhost ~]# vim /etc/hosts [root@localhost ~]# cat /etc/hosts 127.0.0.1 mail.xxx.com localhost localhost.localdomain localhost4 localhost4.localdomain4 [[email protected] ~]# hostnamectl set-hostname mail.xxx.com [[email protected] ~]# hostname -f3. 安装 iredMail[[email protected] ~]# tar zxf 1.4.2.tar.gz [[email protected] ~]# cd iRedMail-1.4.2/ [[email protected] iRedMail-1.4.2]# chmod +x iRedMail.sh [[email protected] iRedMail-1.4.2]# bash iRedMail.sh4. 安装1.4.2报错: centos 7 不支持 1.5.x[root@mail iRedMail-1.4.2]# bash iRedMail.sh [ INFO ] Checking new version of iRedMail ... << ERROR >> Your iRedMail version (1.4.2) is out of date, please << ERROR >> download the latest version and try again: << ERROR >> http://www.iredmail.org/download.html # 解决方法: 编辑pkgs目录下的get_all.sh 277行, 注释该行 [ X"${CHECK_NEW_IREDMAIL}" != X'NO' ] && \ 277 #check_status_before_run check_new_iredmail5. 根据提示安装5.1 选择 yes5.2 设置邮件目录5.3 选择安装web服务器5.4 选择安装数据库5.5 设置数据库密码5.6 设置邮箱域名5.7 设置邮箱管理员密码5.8 选择需要安装的功能: 默认即可5.9 输入y安装5.10 设置SSH端口号:选择n 默认即可5.11 数据库配置文件5.12 安装完成5.13 配置SSL证书wget https://github.com/acmesh-official/acme.sh/archive/refs/tags/3.0.4.zip ./acme.sh --register-account -m [email protected] ./acme.sh --issue -d mail.xxx.com --webroot /var/www/html ./acme.sh --installcert -d mail.xxx.com --key-file /etc/ssl/private/iRedMail.key --fullchain-file /etc/ssl/certs/iRedMail.crt5.14 重启服务service postfix reload;service dovecot reload;service nginx reload5.15 禁用iRedMail灰名单灰名单(greylist)是一项防止垃圾邮件的功能,iRedMail默认开启了该功能。但是,该功能开启之后,收所有信件的时候都有较长时间的延迟。因此,我们建议这里将该功能关闭。chmod +w /opt/iredapd/settings.py编辑文件 /opt/iredapd/settings.pyplugins = ["reject_null_sender", "wblist_rdns", "reject_sender_login_mismatch", "greylisting", "throttle", "amavisd_wblist", "sql_alias_access_policy"]将其中的”greylisting”删去,重启iredapd, 并且恢复文件权限。service iredapd restart chmod -w /opt/iredapd/settings.py5.16 配置 SPF, DMARC, DKIM 记录spf 记录:v=spf1 a mx ~alldmarc记录:v=DMARC1; p=quarantine;rua=mailto:[email protected];ruf=mailto:[email protected] #或 v=DMARC1; p=none; pct=100; rua=mailto:[email protected]记录:v=DKIM1;p=;MIIBIjANBgkqhkiG9w0BAQEFAAOCAQ8AMIIBCgKCAQEAz41gWDBURXfzNvnIofgKD8EC/eKoGTuU1N/98eAmysmpR9z4w+AbneXyUU32H2cGakinZ5qxFMl7iPjEBVw/aXDNGvgxXrxUhSaYC1fhiuxP5JjzW6km8DCl9cneBQ/QUtZxLdrC0EN+3inrqYI7ERWdQpPvTP2/NzjMMmJj7agxL2ssp87yzNFIJAtI5bB/7r5AivBznPdJQiag5cxwqBhB5eIK7yRuUvkXhO7bdVPtNFo1DQOXUcdzDe8PthMmw4YVV/aX+cNrZjCu4tpyC3eyZpeoxVreOehcgf8sDR0/3iJLBjX19WYfH7Z7S448L0VEe/1jI3TYQZcKDWJe;pwIDAQAB5.17 邮件测试https://www.mail-tester.com/https://tools.wordtothewise.com/authenticationhttps://scanmy.email/-5.18 发送邮件报错: Helo command rejected: ACCESS DENIEDMay 16 08:49:35 mail postfix/smtpd[25697]: NOQUEUE: reject: RCPT from out162-62-57-87.mail.qq.com[162.62.57.87]: 554 5.7.1 <out162-62-57-87.mail.qq.com>: Helo command rejected: ACCESS DENIED. Your email was rejected because the sending mail server appears to be on a dynamic IP address that should not be doing direct mail delivery (162-62-57-87); from=<[email protected]> to=<[email protected]> proto=ESMTP helo=<out162-62-57-87.mail.qq.com>解决方法: 编辑 /etc/postfix/main.cf 注释 helo_access.pcresmtpd_helo_restrictions = permit_mynetworks permit_sasl_authenticated #check_helo_access pcre:/etc/postfix/helo_access.pcre reject_non_fqdn_helo_hostname reject_unknown_helo_hostname5.18 启用端口号 25Enable smtp authentication by uncommenting settings below in Postfix config file /etc/postfix/main.cf (Linux/OpenBSD) or /usr/local/etc/postfix/main.cf (FreeBSD):smtpd_sasl_auth_enable = yes smtpd_sasl_security_options = noanonymous smtpd_tls_auth_only = yes5.19 启用 SMTPS 服务(SMTP over SSL,端口 465)从 iRedMail-1.5.0 开始,默认启用 smtps。如何启用 SMTPS要启用 SMTPS,您应该先将 Postfix 配置为监听 465 端口,然后在 iptables 中打开 465 端口。请在 Postfix 配置文件/etc/postfix/master.cf(Linux/OpenBSD) 或/usr/local/etc/postfix/master.cf(FreeBSD) 中附加以下行:465 inet n - n - - smtpd -o syslog_name=postfix/smtps -o smtpd_tls_wrappermode=yes -o smtpd_sasl_auth_enable=yes -o smtpd_client_restrictions=permit_sasl_authenticated,reject -o content_filter=smtp-amavis:[127.0.0.1]:10026重新启动 Postfix 服务以启用 SMTPS。警告:请确保您有 Amavisd 监听端口 10026(和 10024、9998)。465在防火墙中打开端口在 RHEL/CentOS 上在 RHEL/CentOS 6 上,请更新 iptables 规则文件/etc/sysconfig/iptables,为端口 465 添加一条规则(下面代码中的第三行),然后重新启动 iptables 服务。# Part of file: /etc/sysconfig/iptables -A INPUT -p tcp --dport 25 -j ACCEPT -A INPUT -p tcp --dport 587 -j ACCEPT -A INPUT -p tcp --dport 465 -j ACCEPT在 RHEL/CentOS 7 上,请添加文件/etc/firewalld/services/smtps.xml,内容如下<?xml version="1.0" encoding="utf-8"?> <service> <short>Enable SMTPS</short> <description>Enable SMTPS.</description> <port protocol="tcp" port="465"/> </service>更新文件,通过在块内/etc/firewalld/zones/iredmail.xml插入行来启用 smtps 服务,如下所示:<zone> ... <service name="smtps"/> </zone>重启firewalld服务:# firewall-cmd --complete-reload在 Debian/Ubuntu 上表格nftables在 Debian/Ubuntu 上使用最新的 iRedMail 版本,你可以找到它的配置文件/etc/nftables.conf,在提交的行下添加端口 465(端口 587,下例中的第 3 行),如下所示: # smtp/submission tcp dport 25 accept tcp dport 587 accept tcp dport 465 accept需要重启nftables服务。iptables旧的 iRedMail 版本在 Debian/Ubuntu 上使用 iptables,你可以找到 iptables 规则文件/etc/default/iptables,请在 465 端口添加一条规则(下面代码中的第三行),然后重新启动 iptables 服务。# Part of file: /etc/default/iptables -A INPUT -p tcp --dport 25 -j ACCEPT -A INPUT -p tcp --dport 587 -j ACCEPT -A INPUT -p tcp --dport 465 -j ACCEPT需要重启iptables服务。iptables-restore < /etc/default/iptables5.20 允许没有 STARTTLS 的不安全 POP3/IMAP/SMTP 连接使用默认的 iRedMail 设置,所有客户端都必须通过 STARTTLS 使用 POP3/IMAP/SMTP 服务以实现安全连接。如果您的邮件客户端尝试通过不支持 TLS 的协议 POP3/IMAP 访问邮箱,您将收到如下错误消息:Plaintext authentication disallowed on non-secure (SSL/TLS) connections允许不安全的 POP3/IMAP 连接如果您出于某种原因(同样不推荐)想要在没有 STARTTLS 的情况下启用 POP3/IMAP 服务,请在 Dovecot 配置文件中更新以下两个参数/etc/dovecot/dovecot.conf并重新启动 Dovecot 服务:在 Linux 和 OpenBSD 上,它是/etc/dovecot/dovecot.conf在 FreeBSD 上,它是/usr/local/etc/dovecot/dovecot.confdisable_plaintext_auth=no ssl=yes同样,强烈建议仅使用 POP3S/IMAPS 以获得更好的安全性。iRedMail 配置的默认和推荐设置是:disable_plaintext_auth=yes ssl=required允许端口 25 上的不安全 SMTP 连接请在 Postfix 配置文件中注释掉下面的行/etc/postfix/main.cf 并重新加载或重新启动 Postfix 服务:smtpd_sasl_auth_enable = yes smtpd_sasl_security_options = noanonymous # force all clients to use secure connection through port 25 #smtpd_tls_auth_only=yes\******************************************************************** \* URLs of installed web applications: \* \* - Roundcube webmail: https://mail.xxx.com/mail/ \* - netdata (monitor): https://mail.xxx.com/netdata/ \* \* - Web admin panel (iRedAdmin): https://mail.xxx.com/iredadmin/ \* \* You can login to above links with below credential: \* * - Username: [email protected] * - Password: 密码 * * ******************************************************************** * Congratulations, mail server setup completed successfully. Please * read below file for more information: * * - /root/iRedMail-1.4.2/iRedMail.tips * * And it's sent to your mail account [email protected]. * ********************* WARNING ************************************** * * Please reboot your system to enable all mail services. * ******************************************************************** Admin of domain xxx.com: * Account: [email protected] * Password: xxx You can login to iRedAdmin with this account, login name is full email address. First mail user: * Username: [email protected] * Password: xxx * SMTP/IMAP auth type: login * Connection security: STARTTLS or SSL/TLS You can login to webmail with this account, login name is full email address. * Enabled services: rsyslog postfix mysql nginx php7.3-fpm dovecot clamav-daemon amavis clamav-freshclam fail2ban cron nftables SSL cert keys (size: 4096): - /etc/ssl/certs/iRedMail.crt - /etc/ssl/private/iRedMail.key Mail Storage: - Mailboxes: /var/vmail/vmail1 - Mailbox indexes: - Global sieve filters: /var/vmail/sieve - Backup scripts and backup copies: /var/vmail/backup MySQL: * Root user: root, Password: "xxx" (without quotes) * Bind account (read-only): - Username: vmail, Password: xxxx * Vmail admin account (read-write): - Username: vmailadmin, Password: xxxx * Config file: /etc/mysql/my.cnf * RC script: /etc/init.d/mysql Virtual Users: - /root/iRedMail-1.3.2/samples/iredmail/iredmail.mysql - /root/iRedMail-1.3.2/runtime/*.sql Backup MySQL database: * Script: /var/vmail/backup/backup_mysql.sh * See also: # crontab -l -u root Postfix: * Configuration files: - /etc/postfix - /etc/postfix/aliases - /etc/postfix/main.cf - /etc/postfix/master.cf * SQL/LDAP lookup config files: - /etc/postfix/mysql Dovecot: * Configuration files: - /etc/dovecot/dovecot.conf - /etc/dovecot/dovecot-ldap.conf (For OpenLDAP backend) - /etc/dovecot/dovecot-mysql.conf (For MySQL backend) - /etc/dovecot/dovecot-pgsql.conf (For PostgreSQL backend) - /etc/dovecot/dovecot-used-quota.conf (For real-time quota usage) - /etc/dovecot/dovecot-share-folder.conf (For IMAP sharing folder) * Syslog config file: - /etc/rsyslog.d/1-iredmail-dovecot.conf (present if rsyslog >= 8.x) * RC script: /etc/init.d/dovecot * Log files: - /var/log/dovecot/dovecot.log - /var/log/dovecot/sieve.log - /var/log/dovecot/lmtp.log - /var/log/dovecot/lda.log (present if rsyslog >= 8.x) - /var/log/dovecot/imap.log (present if rsyslog >= 8.x) - /var/log/dovecot/pop3.log (present if rsyslog >= 8.x) - /var/log/dovecot/sieve.log (present if rsyslog >= 8.x) * See also: - /var/vmail/sieve/dovecot.sieve - Logrotate config file: /etc/logrotate.d/dovecot Nginx: * Configuration files: - /etc/nginx/nginx.conf - /etc/nginx/sites-available/00-default.conf - /etc/nginx/sites-available/00-default-ssl.conf * Directories: - /etc/nginx - /var/www/html * See also: - /var/www/html/index.html php-fpm: * Configuration files: /etc/php/7.3/fpm/pool.d/www.conf PHP: * PHP config file for Nginx: * Disabled functions: posix_uname,eval,pcntl_wexitstatus,posix_getpwuid,xmlrpc_entity_decode,pcntl_wifstopped,pcntl_wifexited,pcntl_wifsignaled,phpAds_XmlRpc,pcntl_strerror,ftp_exec,pcntl_wtermsig,mysql_pconnect,proc_nice,pcntl_sigtimedwait,posix_kill,pcntl_sigprocmask,fput,phpinfo,system,phpAds_remoteInfo,ftp_login,inject_code,posix_mkfifo,highlight_file,escapeshellcmd,show_source,pcntl_wifcontinued,fp,pcntl_alarm,pcntl_wait,ini_alter,posix_setpgid,parse_ini_file,ftp_raw,pcntl_waitpid,pcntl_getpriority,ftp_connect,pcntl_signal_dispatch,pcntl_wstopsig,ini_restore,ftp_put,passthru,proc_terminate,posix_setsid,pcntl_signal,pcntl_setpriority,phpAds_xmlrpcEncode,pcntl_exec,ftp_nb_fput,ftp_get,phpAds_xmlrpcDecode,pcntl_sigwaitinfo,shell_exec,pcntl_get_last_error,ftp_rawlist,pcntl_fork,posix_setuid ClamAV: * Configuration files: - /etc/clamav/clamd.conf - /etc/clamav/freshclam.conf - /etc/logrotate.d/clamav * RC scripts: + /etc/init.d/clamav-daemon + /etc/init.d/clamav-freshclam Amavisd-new: * Configuration files: - /etc/amavis/conf.d/50-user - /etc/postfix/master.cf - /etc/postfix/main.cf * RC script: - /etc/init.d/amavis * SQL Database: - Database name: amavisd - Database user: amavisd - Database password: xxxx DNS record for DKIM support: ; key#1 2048 bits, i=dkim, d=xxx.com, /var/lib/dkim/xxx.com.pem dkim._domainkey.xxx.com. 3600 TXT ( "v=DKIM1; p=" "MIIBIjANBgkqhkiG9w0BAQEFAAOCAQ8AMIIBCgKCAQEAz41gWDBURXfzNvnIofgK" "D8EC/eKoGTuU1N/98eAmysmpR9z4w+AbneXyUU32H2cGakinZ5qxFMl7iPjEBVw/" "aXDNGvgxXrxUhSaYC1fhiuxP5JjzW6km8DCl9cneBQ/QUtZxLdrC0EN+3inrqYI7" "ERWdQpPvTP2/NzjMMmJj7agxL2ssp87yzNFIJAtI5bB/7r5AivBznPdJQiag5cxw" "qBhB5eIK7yRuUvkXhO7bdVPtNFo1DQOXUcdzDe8PthMmw4YVV/aX+cNrZjCu4tpy" "C3eyZpeoxVreOehcgf8sDR0/3iJLBjX19WYfH7Z7S448L0VEe/1jI3TYQZcKDWJe" "pwIDAQAB") SpamAssassin: * Configuration files and rules: - /etc/mail/spamassassin - /etc/mail/spamassassin/local.cf iRedAPD - Postfix Policy Server: * Version: 4.6 * Listen address: 127.0.0.1, port: 7777 * SQL database account: - Database name: iredapd - Username: iredapd - Password: xxx * Configuration file: - /opt/iredapd/settings.py * Related files: - /opt/iRedAPD-4.6 - /opt/iredapd (symbol link to /opt/iRedAPD-4.6 iRedAdmin - official web-based admin panel: * Version: 1.2 * Root directory: /opt/www/iRedAdmin-1.2 * Config file: /opt/www/iRedAdmin-1.2/settings.py * Web access: - URL: https://mail.xxx.com/iredadmin/ - Username: [email protected] - Password: xxx * SQL database: - Database name: iredadmin - Username: iredadmin - Password: xxxx Roundcube webmail: /opt/www/roundcubemail-1.4.9 * Config file: /opt/www/roundcubemail-1.4.9/config * Web access: - URL: http://mail.xxx.com/mail/ (will be redirected to https:// site) - URL: https://mail.xxx.com/mail/ (secure connection) - Username: [email protected] - Password: xxxx * SQL database account: - Database name: roundcubemail - Username: roundcube - Password: xxxxx * Cron job: - Command: "crontab -l -u root" netdata (monitor): - Config files: - All config files: /opt/netdata/etc/netdata - Main config file: /opt/netdata/etc/netdata/netdata.conf - Modified modular config files: - /opt/netdata/etc/netdata/go.d - /opt/netdata/etc/netdata/python.d - HTTP auth file (if you need a new account to access netdata, please update this file with command like 'htpasswd' or edit manually): - /etc/nginx/netdata.users - Log directory: /opt/netdata/var/log/netdata - SQL: - Username: netdata - Password: xxxxx - NOTE: No database required by netdata.
 -
Python循环语句- for 一、 基本语法for <循环变量> in <遍历对象>: <语句>二、例1In [3]: for i in [1, 2, 3, 4, 5]: ...: print(str(i)+'x'+str(i)+'='+str(i*i)) 1x1=1 2x2=4 3x3=9 4x4=16 5x5=25三、 for语句、continue语句、break语句In [7]: for i in [1, 2, 3, 4, 5]: ...: if i == 2: ...: continue ...: print(i) ...: if i == 4: ...: break ...: else: ...: print('end') 1 3 4 四、for循环遍历字典In [9]: dict = {'apple':10, 'banana':20, 'pear':30} In [10]: for key,value in dict.items(): ...: print(key,':',value) apple : 10 banana : 20 pear : 30五、 只遍历键In [11]: for key in dict.keys(): ...: print(key) apple banana pear六、 rang函数:语法range([start,] stop[, step] )start 可选参数: 起始数,默认值为0stop 终止数: 如果range只有一个参数x,那么range生产一个从0至x-1的整数列表step 可选参数:步长,即每次循环序列增长值。例1:In [12]: for i in range(5): ...: print(i) 0 1 2 3 4例2:In [13]: for i in range(0,10,2): ...: print(i) 0 2 4 6 8
-
Ubuntu-Netplan configuration examples From:https://netplan.io/examples/Below are a collection of example netplan configurations for common scenarios. If you see a scenario missing or have one to contribute, please file a bug against this documentation with the example using the links at the bottom of this page. Thank you!ConfigurationTo configure netplan, save configuration files under /etc/netplan/ with a .yaml extension (e.g. /etc/netplan/config.yaml), then run sudo netplan apply. This command parses and applies the configuration to the system. Configuration written to disk under /etc/netplan/ will persist between reboots.Using DHCP and static addressingTo let the interface named ‘enp3s0’ get an address via DHCP, create a YAML file with the following:network: version: 2 renderer: networkd ethernets: enp3s0: dhcp4: trueTo instead set a static IP address, use the addresses key, which takes a list of (IPv4 or IPv6), addresses along with the subnet prefix length (e.g. /24). DNS information can be provided as well, and the gateway can be defined via a default route:network: version: 2 renderer: networkd ethernets: enp3s0: addresses: - 10.10.10.2/24 nameservers: search: [mydomain, otherdomain] addresses: [10.10.10.1, 1.1.1.1] routes: - to: default via: 10.10.10.1Connecting multiple interfaces with DHCPMany systems now include more than one network interface. Servers will commonly need to connect to multiple networks, and may require that traffic to the Internet goes through a specific interface despite all of them providing a valid gateway.One can achieve the exact routing desired over DHCP by specifying a metric for the routes retrieved over DHCP, which will ensure some routes are preferred over others. In this example, ‘enred’ is preferred over ‘engreen’, as it has a lower route metric:network: version: 2 ethernets: enred: dhcp4: yes dhcp4-overrides: route-metric: 100 engreen: dhcp4: yes dhcp4-overrides: route-metric: 200Connecting to an open wireless networkNetplan easily supports connecting to an open wireless network (one that is not secured by a password), only requiring that the access point is defined:network: version: 2 wifis: wl0: access-points: opennetwork: {} dhcp4: yesConnecting to a WPA Personal wireless networkWireless devices use the ‘wifis’ key and share the same configuration options with wired ethernet devices. The wireless access point name and password should also be specified:network: version: 2 renderer: networkd wifis: wlp2s0b1: dhcp4: no dhcp6: no addresses: [192.168.0.21/24] nameservers: addresses: [192.168.0.1, 8.8.8.8] access-points: "network_ssid_name": password: "**********" routes: - to: default via: 192.168.0.1Connecting to WPA Enterprise wireless networksIt is also common to find wireless networks secured using WPA or WPA2 Enterprise, which requires additional authentication parameters.For example, if the network is secured using WPA-EAP and TTLS:network: version: 2 wifis: wl0: access-points: workplace: auth: key-management: eap method: ttls anonymous-identity: "@internal.example.com" identity: "[email protected]" password: "v3ryS3kr1t" dhcp4: yesOr, if the network is secured using WPA-EAP and TLS:network: version: 2 wifis: wl0: access-points: university: auth: key-management: eap method: tls anonymous-identity: "@cust.example.com" identity: "[email protected]" ca-certificate: /etc/ssl/cust-cacrt.pem client-certificate: /etc/ssl/cust-crt.pem client-key: /etc/ssl/cust-key.pem client-key-password: "d3cryptPr1v4t3K3y" dhcp4: yesMany different modes of encryption are supported. See the Netplan reference page.Using multiple addresses on a single interfaceThe addresses key can take a list of addresses to assign to an interface:network: version: 2 renderer: networkd ethernets: enp3s0: addresses: - 10.100.1.38/24 - 10.100.1.39/24 routes: - to: default via: 10.100.1.1Interface aliases (e.g. eth0:0) are not supported.Using multiple addresses with multiple gatewaysSimilar to the example above, interfaces with multiple addresses can beconfigured with multiple gateways.network: version: 2 renderer: networkd ethernets: enp3s0: addresses: - 10.0.0.10/24 - 11.0.0.11/24 routes: - to: default via: 10.0.0.1 metric: 200 - to: default via: 11.0.0.1 metric: 300We configure individual routes to default (or 0.0.0.0/0) using the address of the gateway for the subnet. The metric value should be adjusted so the routing happens as expected.DHCP can be used to receive one of the IP addresses for the interface. In this case, the default route for that address will be automatically configured with a metric value of 100.Using Network Manager as a rendererNetplan supports both networkd and Network Manager as backends. You can specify which network backend should be used to configure particular devices by using the renderer key. You can also delegate all configuration of the network to Network Manager itself by specifying only the renderer key:network: version: 2 renderer: NetworkManagerConfiguring interface bondingBonding is configured by declaring a bond interface with a list of physical interfaces and a bonding mode. Below is an example of an active-backup bond that uses DHCP to obtain an address:network: version: 2 renderer: networkd bonds: bond0: dhcp4: yes interfaces: - enp3s0 - enp4s0 parameters: mode: active-backup primary: enp3s0Below is an example of a system acting as a router with various bonded interfaces and different types. Note the ‘optional: true’ key declarations that allow booting to occur without waiting for those interfaces to activate fully.network: version: 2 renderer: networkd ethernets: enp1s0: dhcp4: no enp2s0: dhcp4: no enp3s0: dhcp4: no optional: true enp4s0: dhcp4: no optional: true enp5s0: dhcp4: no optional: true enp6s0: dhcp4: no optional: true bonds: bond-lan: interfaces: [enp2s0, enp3s0] addresses: [192.168.93.2/24] parameters: mode: 802.3ad mii-monitor-interval: 1 bond-wan: interfaces: [enp1s0, enp4s0] addresses: [192.168.1.252/24] nameservers: search: [local] addresses: [8.8.8.8, 8.8.4.4] parameters: mode: active-backup mii-monitor-interval: 1 gratuitious-arp: 5 routes: - to: default via: 192.168.1.1 bond-conntrack: interfaces: [enp5s0, enp6s0] addresses: [192.168.254.2/24] parameters: mode: balance-rr mii-monitor-interval: 1Configuring network bridgesTo create a very simple bridge consisting of a single device that uses DHCP, write:network: version: 2 renderer: networkd ethernets: enp3s0: dhcp4: no bridges: br0: dhcp4: yes interfaces: - enp3s0A more complex example, to get libvirtd to use a specific bridge with a tagged vlan, while continuing to provide an untagged interface as well would involve:network: version: 2 renderer: networkd ethernets: enp0s25: dhcp4: true bridges: br0: addresses: [ 10.3.99.25/24 ] interfaces: [ vlan15 ] vlans: vlan15: accept-ra: no id: 15 link: enp0s25Then libvirtd would be configured to use this bridge by adding the following content to a new XML file under /etc/libvirtd/qemu/networks/. The name of the bridge in the tag as well as in need to match the name of the bridge device configured using netplan:<network> <name>br0</name> <bridge name='br0'/> <forward mode="bridge"/> </network>Attaching VLANs to network interfacesTo configure multiple VLANs with renamed interfaces:network: version: 2 renderer: networkd ethernets: mainif: match: macaddress: "de:ad:be:ef:ca:fe" set-name: mainif addresses: [ "10.3.0.5/23" ] nameservers: addresses: [ "8.8.8.8", "8.8.4.4" ] search: [ example.com ] routes: - to: default via: 10.3.0.1 vlans: vlan15: id: 15 link: mainif addresses: [ "10.3.99.5/24" ] vlan10: id: 10 link: mainif addresses: [ "10.3.98.5/24" ] nameservers: addresses: [ "127.0.0.1" ] search: [ domain1.example.com, domain2.example.com ]Reaching a directly connected gatewayThis allows setting up a default route, or any route, using the “on-link” keyword where the gateway is an IP address that is directly connected to the network even if the address does not match the subnet configured on the interface.network: version: 2 renderer: networkd ethernets: ens3: addresses: [ "10.10.10.1/24" ] routes: - to: default # or 0.0.0.0/0 via: 9.9.9.9 on-link: trueFor IPv6 the config would be very similar, with the notable difference being an additional scope: link host route to the router’s address required:network: version: 2 renderer: networkd ethernets: ens3: addresses: [ "2001:cafe:face:beef::dead:dead/64" ] routes: - to: "2001:cafe:face::1/128" scope: link - to: default # or "::/0" via: "2001:cafe:face::1" on-link: trueConfiguring source routingRoute tables can be added to particular interfaces to allow routing between two networks:In the example below, ens3 is on the 192.168.3.0/24 network and ens5 is on the 192.168.5.0/24 network. This enables clients on either network to connect to the other and allow the response to come from the correct interface.Furthermore, the default route is still assigned to ens5 allowing any other traffic to go through it.network: version: 2 renderer: networkd ethernets: ens3: addresses: - 192.168.3.30/24 dhcp4: no routes: - to: 192.168.3.0/24 via: 192.168.3.1 table: 101 routing-policy: - from: 192.168.3.0/24 table: 101 ens5: addresses: - 192.168.5.24/24 dhcp4: no routes: - to: default via: 192.168.5.1 - to: 192.168.5.0/24 via: 192.168.5.1 table: 102 routing-policy: - from: 192.168.5.0/24 table: 102Configuring a loopback interfaceNetworkd does not allow creating new loopback devices, but a user can add new addresses to the standard loopback interface, lo, in order to have it considered a valid address on the machine as well as for custom routing:network: version: 2 renderer: networkd ethernets: lo: match: name: lo addresses: [ 7.7.7.7/32 ]Integration with a Windows DHCP ServerFor networks where DHCP is provided by a Windows Server using the dhcp-identifier key allows for interoperability:network: version: 2 ethernets: enp3s0: dhcp4: yes dhcp-identifier: macConnecting an IP tunnelTunnels allow an administrator to extend networks across the Internet by configuring two endpoints that will connect a special tunnel interface and do the routing required. Netplan supports SIT, GRE, IP-in-IP (ipip, ipip6, ip6ip6), IP6GRE, VTI and VTI6 tunnels.A common use of tunnels is to enable IPv6 connectivity on networks that only support IPv4. The example below show how such a tunnel might be configured.Here, 1.1.1.1 is the client’s own IP address; 2.2.2.2 is the remote server’s IPv4 address, “2001:dead:beef::2/64” is the client’s IPv6 address as defined by the tunnel, and “2001:dead:beef::1” is the remote server’s IPv6 address.Finally, “2001:cafe:face::1/64” is an address for the client within the routed IPv6 prefix:network: version: 2 ethernets: eth0: addresses: - 1.1.1.1/24 - "2001:cafe:face::1/64" routes: - to: default via: 1.1.1.254 tunnels: he-ipv6: mode: sit remote: 2.2.2.2 local: 1.1.1.1 addresses: - "2001:dead:beef::2/64" routes: - to: default via: "2001:dead:beef::1"Configuring SR-IOV Virtual FunctionsFor SR-IOV network cards, it is possible to dynamically allocate Virtual Function interfaces for every configured Physical Function. In netplan, a VF is defined by having a link: property pointing to the parent PF.network: version: 2 ethernets: eno1: mtu: 9000 enp1s16f1: link: eno1 addresses : [ "10.15.98.25/24" ] vf1: match: name: enp1s16f[2-3] link: eno1 addresses : [ "10.15.99.25/24" ]
-
Python流程控制语句- if else 一、流程控制语句 if...elif...else语法:if <条件>: <语句> elif <条件>: <语句> else: <语句>1.1 例1num = input('Please input a integer:') num = int(num) if num < 0: print('输入了负数:%d' % num) elif num == 0: print('输入了一个0: %d' % num) else: print('输入了正数 %d' % num)1.2 例2score = input('输入得分数:') score = float(score) if score >= 90: print('成绩为优:') elif score >= 80: print('成绩为良:') elif score >= 60: print('成绩合格:') else: print('成绩不合格!')
-
Python数据类型之-列表、元组、字典 一、 列表 list1.1 列表常用操作函数列表操作描述list.append(x)列表尾部追加成员xlist.count(x)返回列表中的参数x出现的次数list.extend(list2)向列表中追加另一个列表list2list.index(x)返回参数x在列表中的索引序号list.insert(index, object)向列表中指定位置(index)插入数据(object)list.pop()删除列表中尾部的成员,并返回删除的成员list.remove(x)删除列表中的指定成员list.reverse()将列表中成员的顺序反转list.sort将列表中成员排序1.2 append函数In [8]: list = ['a', 'b', 'c'] In [9]: list.append('x') In [10]: list Out[10]: ['a', 'b', 'c', 'x']1.3 extend函数In [11]: list = ['a', 'b', 'c'] In [12]: list2 = [1, 2, 3] In [13]: list.extend(list2) In [14]: list Out[14]: ['a', 'b', 'c', 'x', 1, 2, 3]1.4 remove函数In [15]: list = ['a', 'b', 'c'] In [16]: list.remove('c') In [17]: list Out[17]: ['a', 'b']1.5 pop函数In [19]: list = ['a', 'b', 'c', 'd'] In [20]: list.pop() Out[20]: 'd' In [21]: list Out[21]: ['a', 'b', 'c']1.6 insert函数In [26]: list = ['a', 'b', 'c', 'x', 1, 2, 3] In [27]: list.insert(3, 'd') In [28]: list Out[28]: ['a', 'b', 'c', 'd', 'x', 1, 2, 3]二、列表切片2.1 切片常用方法使用形式描述list[:]取全部元素list[0:]取全部元素list[:-1]取除最后中一外元素之外的所有元素list[1:3]得到[2,3]list[::2]每隔1个取一个元素list[0:5:2]从0至4每隔1个取元素list[::-1]从右至左取全部元素list[5:0:-2]从5至0(不含0),每隔一个取元素#取全部元素 In [4]: list = [1, 2, 3, 4, 5] In [5]: list[:] Out[5]: [1, 2, 3, 4, 5] In [6]: list[0:] Out[6]: [1, 2, 3, 4, 5] #取除最后中一外元素之外的所有元素 In [7]: list[:-1] Out[7]: [1, 2, 3, 4] #得到[2,3] In [8]: list[1:3] Out[8]: [2, 3] #每隔1个取一个元素 In [9]: list[::2] Out[9]: [1, 3, 5] #从0至4每隔1个取元素 In [11]: list[0:5:2] Out[11]: [1, 3, 5] #从右至左取全部元素 In [12]: list[::-1] Out[12]: [5, 4, 3, 2, 1]2.2 列表内置方法方法描述len(list)返回列表元素长度min(list)返回列表中最小值max(list)返回列表中最大值sum(list, start)返回列表中元素的和all(list)列表中所有项为真,则返回真,否则返回假any(list)列表中有一项为真,则返回真,否则返回假2.3 列表求和 sum(list)In [15]: list Out[15]: [1, 2, 3, 4, 5] In [16]: sum(list) Out[16]: 15 In [17]: sum(list, 15) Out[17]: 302.4 列表最大值、最小值In [19]: list = [1, 2, 3, 4, 5] In [20]: max(list) Out[20]: 5 In [21]: min(list) Out[21]: 1三、元组 tuple元组与列表不同的是元组一旦建立是不能改变的,既不能改变其中的数据项,也不能添加和删除数据项。3.1 创建元组# 创建只有一个元素的元组,后面必须加 “,” In [29]: tuple1 = (1,) In [30]: tuple1 = (1, 2, 3) In [31]: tuple1[0] Out[31]: 1 # 修改元组数据项报错 In [32]: tuple1[0] = 'x' ---------------------------------------------------------- TypeError Traceback (most <ipython-input-32-5ecba0cdf597> in <module> ----> 1 tuple1[0] = 'x' TypeError: 'tuple' object does not support item assignment四、字典 dict字典中每个成员是以“键:值”对的形式存在的,与列表不同的是,字典是无序的,在字典中通过键来访问成员,而不能通过索引位置来访问成员。4.1 字典操作函数字典操作描述dict.clear()清空字典dict.copy()复制字典dict.get(k,[default])获得k键对应的值,不存在则返回defaultdict.items()获得由键和值组成的迭代器dict.keys()获得键的迭代器dict.pop(k)删除k:v成员对dict.update(dict1)从另一个字典更新成员(不存在就创建,存在则覆盖)dict.values()获得值的迭代器dict.fromkeys(iter,value)以列表或元组中给字的键建立字典,默认值为valuedict.popitem()从字典中删除任一k:v项并返回它dict.setdefault(k,default)若字典中存在key值为k的,则返回其对应的值;否则在字典中建立一个k:default字典成员4.2 清空字典 dict.clear()In [42]: dict = {'name':'zs', 'age':20} In [43]: dict Out[43]: {'name': 'zs', 'age': 20} In [44]: dict.clear() In [45]: dict Out[45]: {}4.3 复制字典 dict.copy()In [65]: dict = {'name':'zs', 'age':20} In [66]: dict1 = {} In [67]: dict1 Out[67]: {} In [68]: dict1 = dict.copy() In [69]: dict1 Out[69]: {'name': 'zs', 'age': 20}4.4 获取键对应的值,不存在则返回default: dict.get(key, default)In [74]: dict = {'name':'zs', 'age':20} In [75]: dict.get('name') Out[75]: 'zs' In [76]: dict.get('gender', 0) Out[76]: 04.5 获得键值对的迭代器 dict.items(); dict.keys(), dict.values()In [77]: dict = {'name':'zs', 'age':20} In [78]: dict.items() Out[78]: dict_items([('name', 'zs'), ('age', 20)]) In [79]: dict.keys() Out[79]: dict_keys(['name', 'age']) In [80]: dict.values() Out[80]: dict_values(['zs', 20])4.6 更新字典成员 dict.update()In [84]: dict = {'name':'zs', 'age':20} In [85]: dict.update({'address':'SH'}) In [86]: dict Out[86]: {'name': 'zs', 'age': 20, 'address': 'SH'}4.7 删除字典成员 dict.pop()In [86]: dict Out[86]: {'name': 'zs', 'age': 20, 'address': 'SH'} In [87]: dict.pop('address') Out[87]: 'SH' In [88]: dict Out[88]: {'name': 'zs', 'age': 20}